
Flash NEW ASUS RT-N66U B1 Router with DD-WRT
- PC mit LAN-Kabel mit Router verbinden.
# Alle weiteren LAN-Adapter deaktivieren.
# Den noch aktiven LAN-Adapter mit IP-Adresse: 192.168.1.222 konfigurieren.
# Ping zu Router sollte jetzt mögliche sein: ping 192.168.1.1
- Aktuelle Firmware auf Router einspielen
=> RT-N66U_3.0.0.4_380_8120-ge60d6e4.trx
- Router „BootLoader“ ermitteln
# telnet auf Router (IP: 192.168.1.1)
# strings /dev/mtd0ro | grep bl_version
= ODER =
# nvram get bl_version
=> 1.0.1.9
- Router zurücksetzen
# ASUS 30-30-30 Methode
# WPS-Button drücken und Router einschalten. WPS-Button 10Sek. halten.
= ODER =
# https://192.168.1.1/do.htm?cmd=nvram+erase
- Router in den RECOVERY-Modus setzen.
# Nach 10Sek. WPS-Button nicht mehr drücken und gleichzeitig RESET drücken und gedrückt halten, bis „POWER“ LED anfängt zu blinken !!
# miniWeb-Server kann mit Browser über https://192.168.1.1 aufgerufen werden.
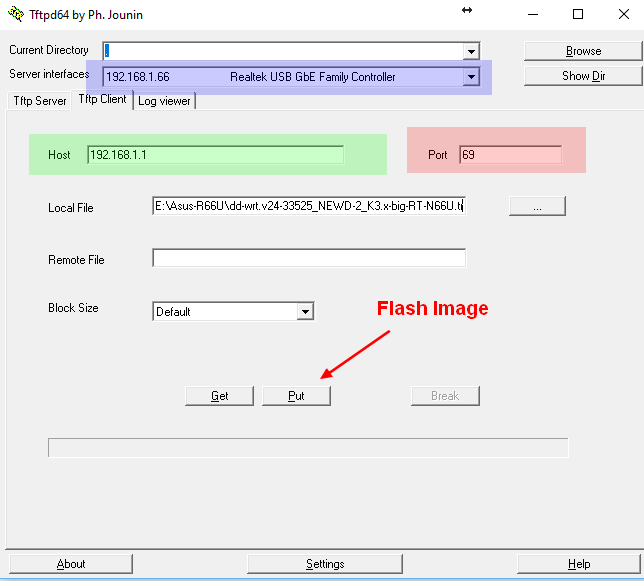
- DDWRT-auf Router einspielen
# Router in den RECOVERY-Modus setzen.
# mit Tftpd64 das aktuelle bzw. fkt. Image auf den Router einspielen.
a. TFTP-Client
b. Image auswählen: dd-wrt.v24-33525_NEWD-2_K3.x-big-RT-N66U.trx
c. Port für TFTP eingeben: 69
d. IP-Adresse des Routers eingeben: 192.168.1.1
e. LAN-Schnittstelle, mit dem PC mit Router verbunden wurde auswählen.
Upon manual firmware restoration the administrator can upload the firmware file directly to the router using TFTP.
C:\>tftp -i 192.168.1.1 put c:\RT-AC87U_3.0.0.4_376_2061-gdea2a5b.trx
Transfer successful: 37543936 bytes in 107 second(s), 350877 bytes/s
- Nach dem „flashen“ … ~5-10 Minuten warten. Danach Router ausschalten nach kurzem warten wieder einschalten.
- Router LEDs sollten wie folgt leuchten:
1. POWER-LED permanent leuchten
2. LAN-LED, mit dem der PC mit Router verbunden ist sollte permanent leuchten.
3. Beider WLAN-LEDs sollten permanent leuchten.
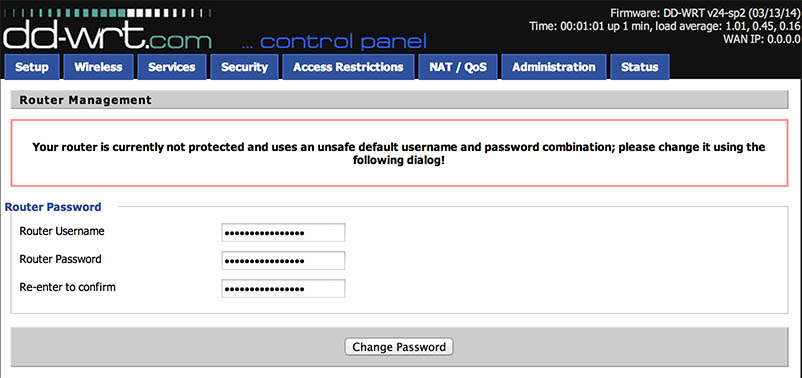
- Router kann nun über den „WebInterface“ konfiguriert werden.
=> https://192.168.1.1
Weitere Infos von: https://www.bayareatechpros.com/dd-wrt-on-asus-rt-n66u/
DD-WRT on Asus RT-N66U
I’ve recently acquired a batch of RT-N66U (hardware version B1) routers for use in Network Setup services and had to flash one of them to DD-WRT to create a free wireless hotspot. Looking through the sea of information I found it somewhat difficult to figure out what to do and wasted a significant chunk of time. I’d like to help others avoid the same problem – so here’s a guide on how to flash DD-WRT on your RT-N66u!

- Take router out of the box
- Plug it in, plug in ethernet cable between LAN port & PC
- Hold the reset button and power on the device, keep holding reset until you see the power light slowly blinking (15 seconds)
- Launch Asus Rescue utility (Utility Download)
- Use Asus Rescue utility to flash BrainSlayer-V24-preSP2 23919.
- Wait up to 1 hour, when the process is done it will light up WiFi leds
- Turn router off, boot router while holding WPS button – it will clear nvram
Wait a few minutes, the router will bootloop and turn on.
Bonus information:
- Do not flash r24461 – it will brick your router and you will need to start over from step #3.
- If updating from within dd-wrt: rename the .txr file to .bin and upload using web interface (192.168.1.1).
- dd-wrt does not have hardware acceleration: Stock builds or Merlin builds will result in faster transfer speeds, should your ISP support them.
- 2.4ghz radio is great for long-range coverage, 5ghz radio is great for high-speed coverage at shorter range.
- QoS is unreliable and causes high CPU temperature and reboots.
- If you are having trouble with high temperature (visible in Status > Router) turn down CPU frequency in Administration > Management.
- If you think you’ve bricked your n66u simply access recovery mode by holding reset button as you turn on the router and using the rescue tool or changing your IPv4 address to: 192.168.1.11 / subnet mask: 255.255.255.0
Schreibe einen Kommentar
Du musst angemeldet sein, um einen Kommentar abzugeben.